This guide is to setup a bastion remote desktop server in order to access yolocolo services delivered by ZeroOne Technologies
Requirements:
A Brain to be able to follow documentation
Credentials to Access ZeroOne Tech OpenStack Tenant
Assumes you do not have any existing configuration in ZeroOne Cloud
Setup Networking
First networking must enabled and request a public IP address to enable an internet routable VM on OpenStack
“Jumpbox” LAN
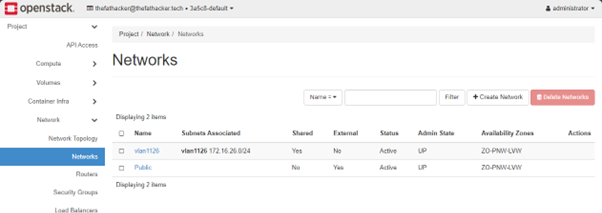
Setup LAN Step 1 Open Networks - OpenStack Dashboard (zeroone.tech), You will have at least two networks listed. 1) Being Public and 2) being vlan1XXX. Public is the Public internet hosted by ZeroOne and vlan1XXX is your network local network for your yolo services. if vlan1XXX is not provisioned in your tenant please contact ZeroOne Support using #chat-suport on ZWS Discord
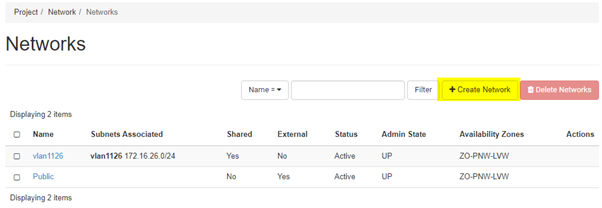
Setup LAN Step 2 You need to create a network for your “Jumpbox” using the “Create Network” option
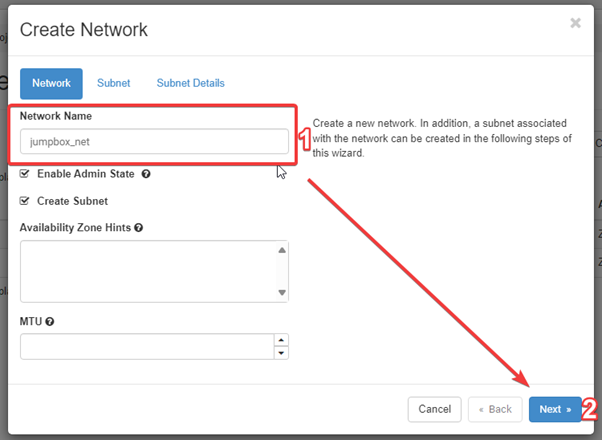
Setup LAN Step 3 Name your network (in this case I am using “jumpbox_net”, leaving all other values as default, then click “Next”
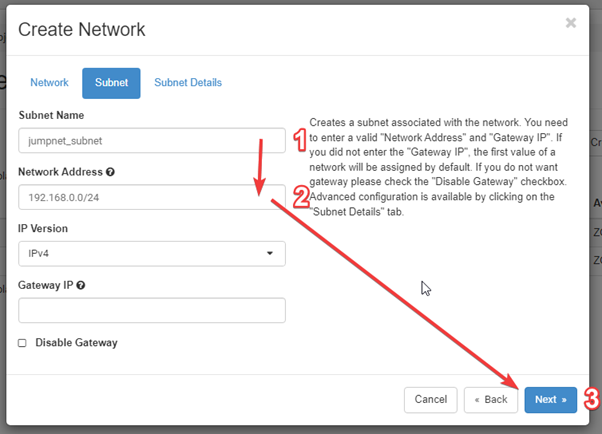
Setup LAN Step 4 Define the IP Scope of this network, by giving it a name and address in CIDR Format. Leave IP Version Defaulted to IPv4 and Gateway Empty (This will be filled out by OpenStack), Then Click on next
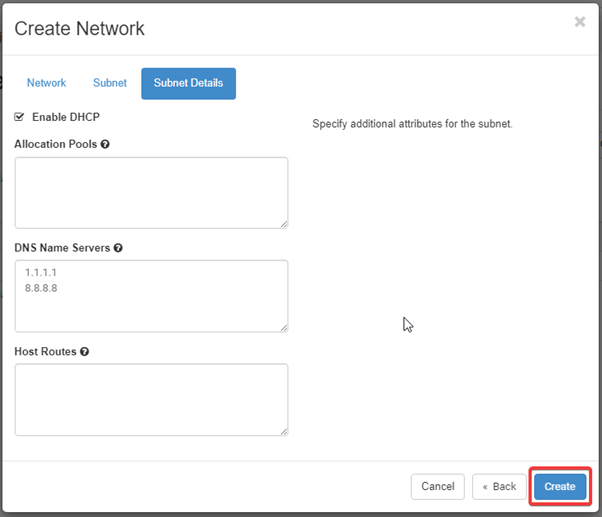
Setup LAN Step 5 On the subnet Details Page, Click create leaving all other details default
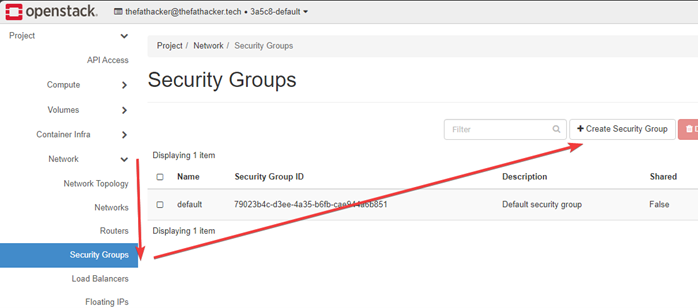
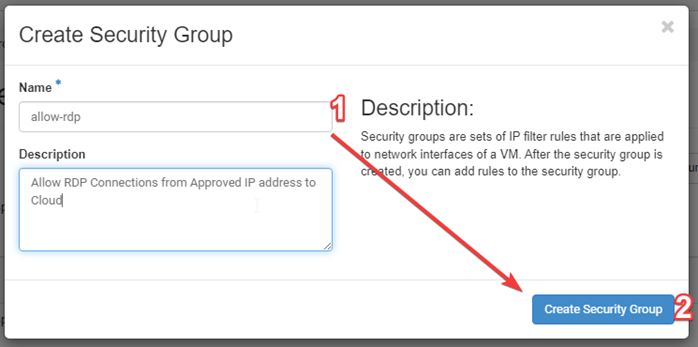
Give it a useful name, in this case it is to allow you to remotely access your “Jumphost” then create.
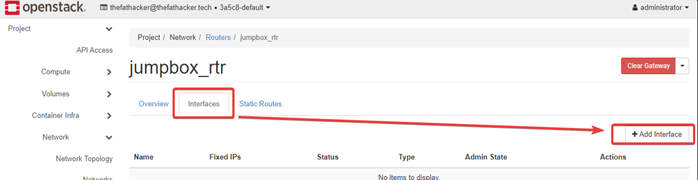
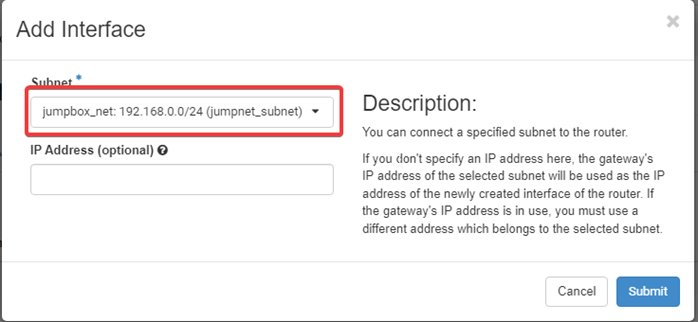
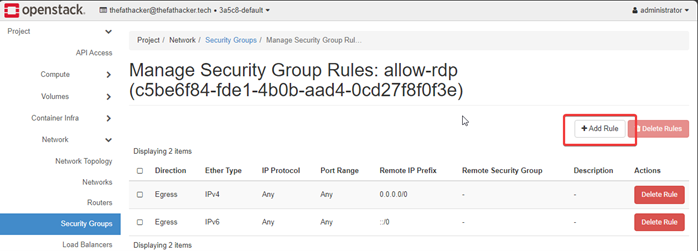
With the Security Group created we can now add rules, add a rule.
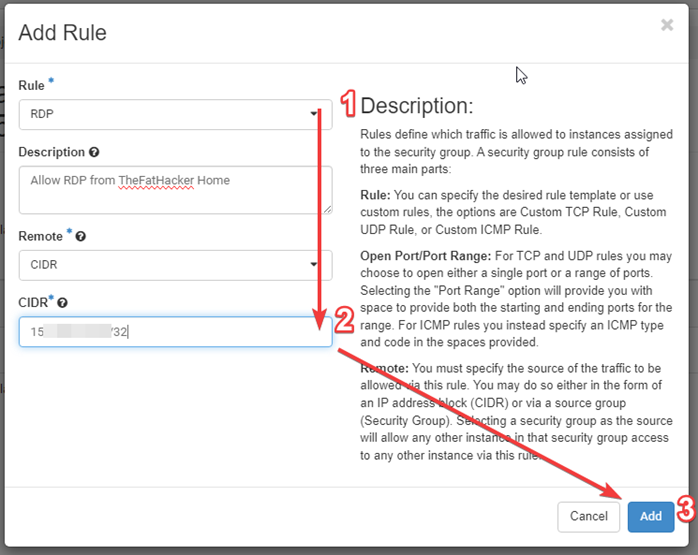
Set the rule type to RDP and enter the source IP of where you will be receiving RDP Requests. If you are unsure of what your IP Address in CIDR Format is you can use services such as WTF is my IP?!?!?? / https://myip.wtf. You can also use 0.0.0.0/0 but this would allow anyone to attempt to connect to your “Jumpbox” on RDP which can be a BadIdea™ , then “add”. Note if you intend to use a Linux Jumpbox, select SSH for the Rule instead
Note on Security Group Rules: Can had multiple and apply multiple to Compute Instances. As a result I will remove default rules from my Security Groups to allow for layering of rulesets. You will see this later, as a result my reset for allow-RDP looks like:
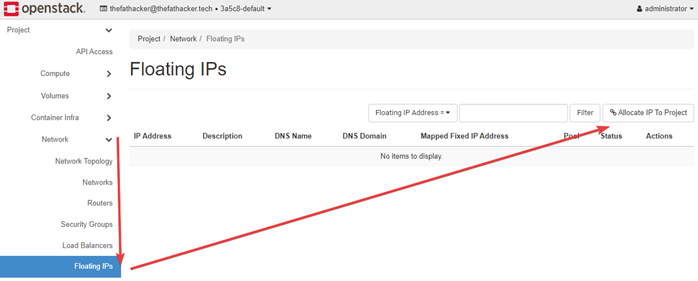
Give the IP A description, then complete the allocation by then clicking “Allocate IP”
Networking Setup - Summary
This completes the Networking Required for Setting up to have a Jumpbox on ZeroOne Cloud to access Yolocolo Services you can see the network layout at Network Topology - OpenStack Dashboard (zeroone.tech)
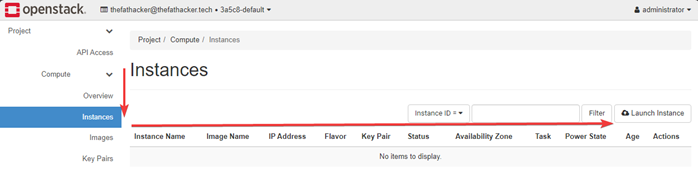
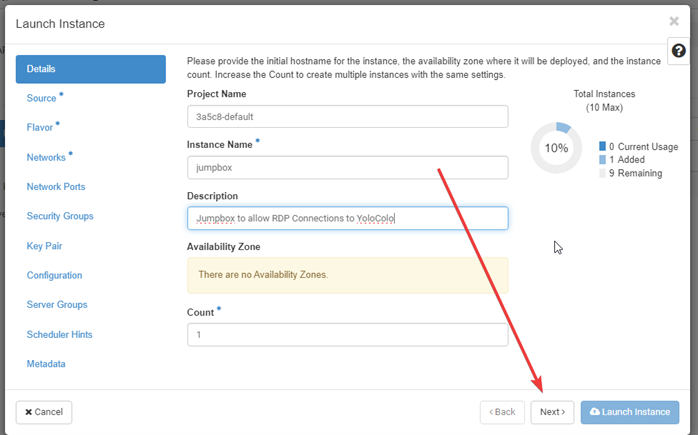
Compute Instance Setup
This section covers the creation and access to a Windows VM to allow access to you YoloColo Network
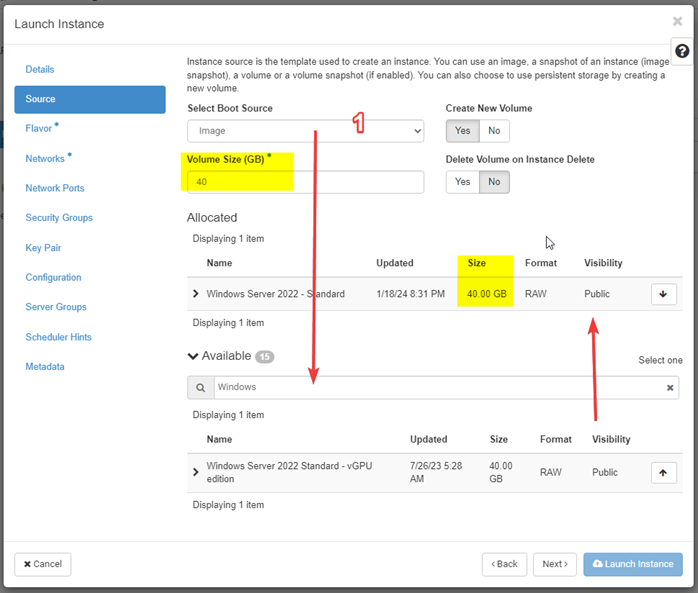
For Source, Change to Image, you can then search for Windows to show available Windows Server 2022 Standard Image which you can then select (DO NOT SELECT “vGPU edition” unless approved by Management for vGPU resource access), Volume Size will now be the minimum size to accept image. You can increase volume size, but not make smaller that Image. Then next
Set the “Flavor” or Size of the VM. In this case I am using a “z1.gs.small” as the Windows Image needs a Minimum RAM allocation of 4096MB, then next
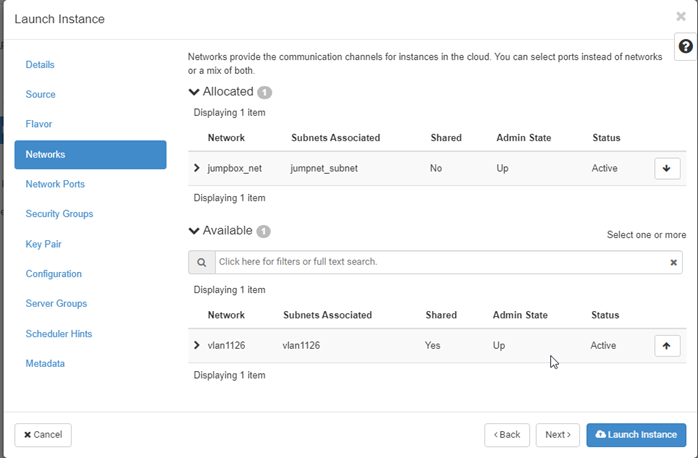
Allocate the Network we create for this in the “Jumpbox” LAN Setup instructions above to this instance. Then next. NOTE:Do not add you vlan1XXX network at this step, as it does not have internet access available and will resolute in this VM not being deployed correctly
Skip Network Ports. No Changes required here
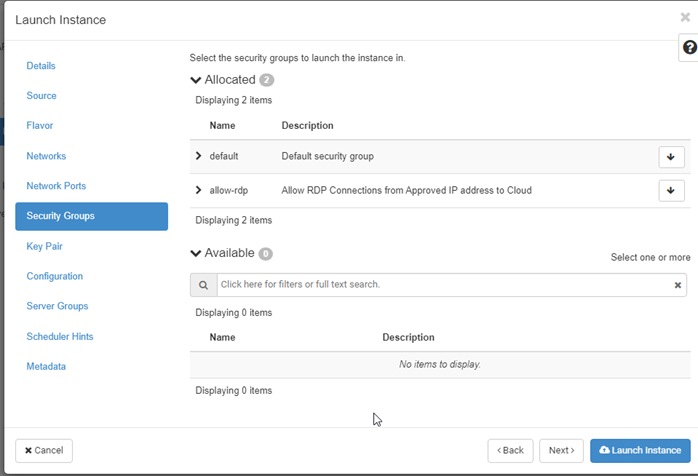
Allocate the Security Group created in Security Group for remote access for Allowing RDP Connections to this device. You will see as per my comments in Security Group for remote access when creating the security group I have the “default” allow we traffic group then the second security group to “allow” RDP connections. Then Next.
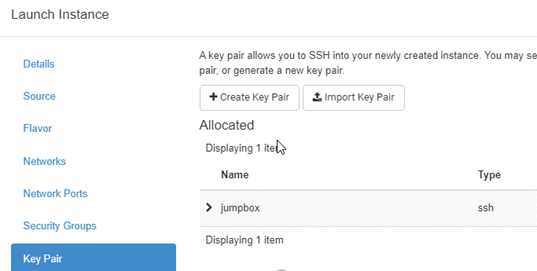
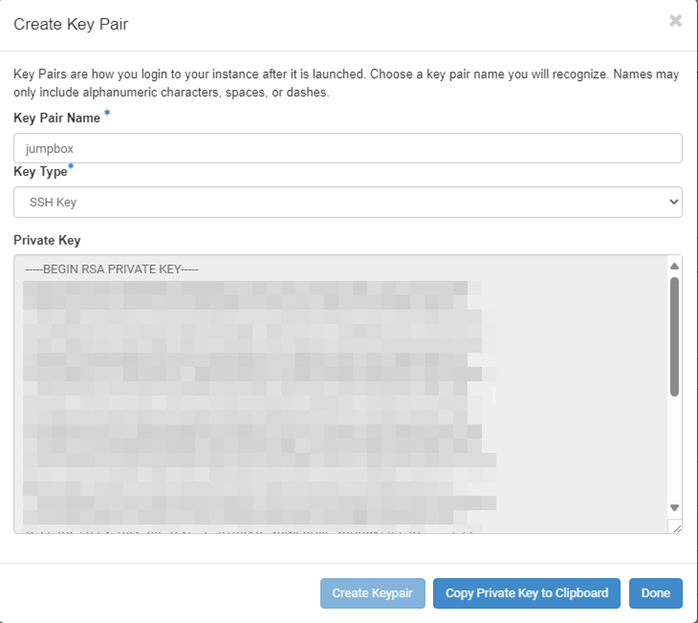
We can now create the private key to secure the password for this machine, if you already have a private key, you can import it or otherwise we will create one now, click on “Create Key Pair”, give it a name and type of SSH (YOU MUST SAVE THIS KEY AS WE CANNNOT RECOVER IT AND WITHOUT IT YOU CANNNOT ACCESS THIS VM AND IT WILL NEED TO BE RECREATED)
PLEASE NOTE: OpenStack and ZeroOne DO NOT store this private keys if you do not save it cannot be recovered, additionally if you do not store or share it appropriately we are not responsible for any unauthorized access to your instances. Treat your SSH keys like you would treat your password.
With the Key Pair defined we can now “Launch”
Wait
We must wait for the Instance to complete building after we Launch as we the last step before continuing. This will take 5-10 minutes to complete, grab a coffee, tea, monster, beer, rum or other beverage of choice but to remember to drink and compute under the influence safely
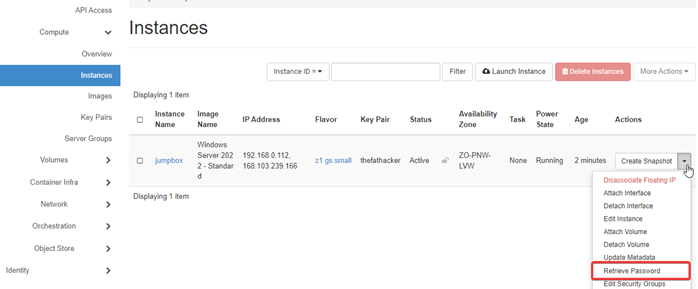
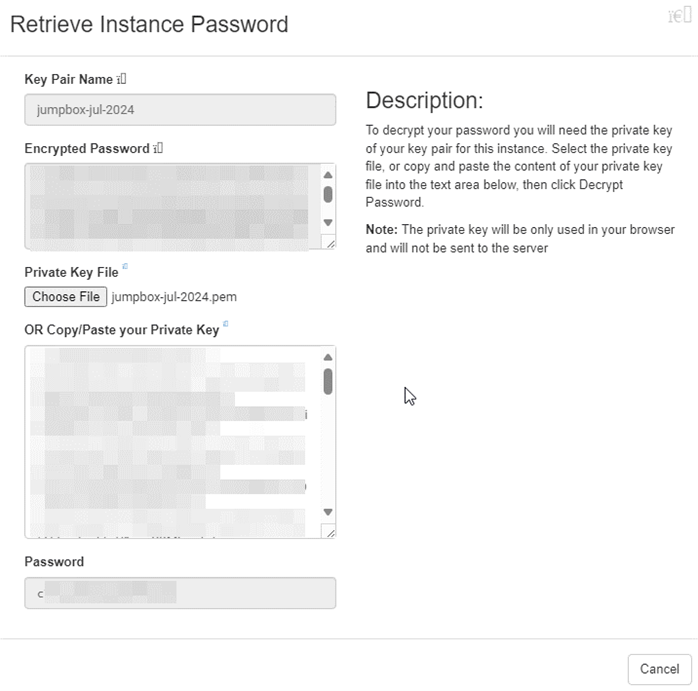
Due to issues with how to getting a password safely sent to the instance at setup time, OpenStack instead randomly generates the password and securely encrypts it with your public key setup in Create Instance - Step 8, As previously noted if you have an issue with the private key, we will be unable to recover your password to access this Instance
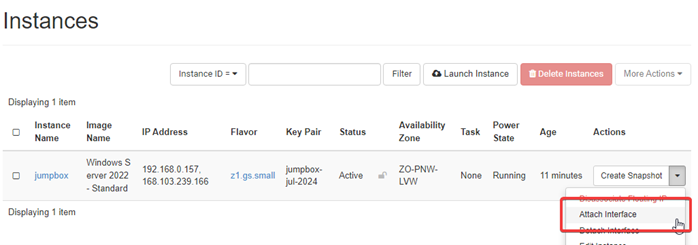
Click on the options dropdown on the line for your created Jumpbox Instance and select "Attach Interface"
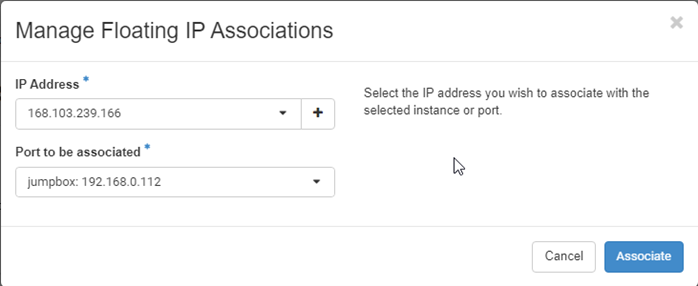
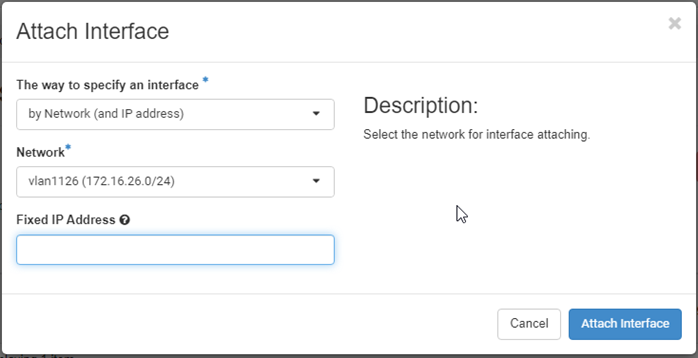
You can now set the IP address for the instance on the YoloColo Network, if you do not set "Fixed IP Address" one will be automatically set from the network defined from the network defined for your YoloColo LAN. If you do choice to set an IP Address do not use an IP Address below .10 as these are reserved for Openstack Services.
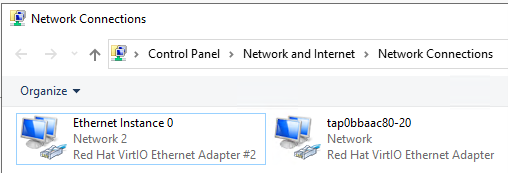
You will now have two Networks available in your remote desktop, you may need to set the IP Address on this interface, if this is required, this must be the EXACT IP address as shown in the Instances - OpenStack Dashboard (zeroone.tech) for your yolocolo network